Showing posts with label Home Decor. Show all posts

Sunday, December 21

Christmas Collab! DIY Felt Stocking Ornament

 Hello everyone!
I am very excited today because I am collaborating for the first time. I'm very happy because this collaboration is with the lovely Fran from Elevator Brain (even her blog title is cool!). On her blog, she posts sketches and paintings made by her talented self, inspirational posts and some tips. You should definitively check it out because it's awesome! We decided to do Christmas DIYs. She made a Christmas tree out of magazines!

I chose to do a felt ornament. I made this little monogrammed sock. It's very easy and takes a bit of time if you decide to hand-stitch it like I did, but I did it while watching a movie with my family so it was really nice. Fabric glue or hot glue are fine though, since you normally shouldn't have to wash it.
 You'll need: felt in two colors, ribbon, scissors, a needle and thread in two colors (or glue), paper and a pen.
Cut out 2 socks in one color. Then, in your other color, cut out little embellishments like two heel patches or that band that goes at the top. (be careful: if there is a right and a wrong side to your felt, you should cut one and then reverse it to cut the second one) To make the letter, I first drew out a few 'J's on paper until I was happy with how it looked. Then I cut it out of the paper and used it as a pattern to cut it out of the felt.
Sew the letter on one of the sock shapes. After it's done, sew the two sock shapes together.
Sew the little heel patches on both sides of the sock.
Put the white band at the top of the sock on each side, and put your ribbon in between. Sew it all together and you're done!
I hope you liked this tutorial and will use it. I made this little ornament for my class's Secret Santa. The guy whose name I had picked is allergic to lots of things, including chocolate so anything edible wasn't an option. I decided to make this because it's personalized and everyone loves hand-made gifts, don't they?

Don't forget to check out Fran's DIY and have a nice day!
Love, Elsa

Thursday, December 11

DIY: Snowflake Candle Holder

Penguin candle: PRIMARK
Hi friends!
Today I want to show you this simple candle holder I made. I used a glass yogurt jar, white acrylic paint and a tiny paintbrush. It was quite simple but also a bit long. It took me a bit less than an hour to cover the entire jar with snowflakes. You also have to hold your brush as still as humanly possible if you want thin lines. Once I was done, I waited for it to dry completely and put a small candle inside. If you make this, you could also use it to store pens, make-up brushes, or anything else you can put in a jar! This could make a cute small gift. I really hope you'll try this out.
Love, Elsa

Saturday, October 4

DIY: Fall/Autumn watercolor artwork

Hi friends!
Today's post is not about nail art! I'm happy to show you some watercolors today. As much as I love nail art, I'm happy to be finished with the challenge so I have more time to do other stuff. I chose to make something for fall/autumn (depends how you call it). It was really easy and it looks so cute! And you can easily do it too. Here's how:
You'll need one or two thin brushes, some water and of course watercolors! Here are the colors I used. I used red, orange and yellow the most. The brow was only for small details so it's not that important.
I am assuming you know the basics to watercolor but if you don't I would advise to watch some tutorials. I myself learned watercolors on youtube. I'm really not an expert at them but it's quite easy. So, to make the leaf, draw the outline (and fill it in) with a pale color so you'll be able to add more color on it. Then, use your lighter color at the top of the leaf (yellow). After that, put your medium color around the middle (orange) and the darkest color at the bottom (red). Don't forget to blend it in with a bit a water, it makes all the difference!
I did the same for the writing. Use a pale color first and then add more, blending between each color to make the gradient nicer. As you can see from this picture, I did several mistakes but you can only see them from really close so they don't bother me that much. Also, I painted the writing on a different piece of paper and added it after because I was afraid of messing it up. Of course you could just write directly below the leaf.
I hope you liked this tutorial and if you try it out, please give me a link in the comments! Love, Elsa

Saturday, August 23

6 Ways to Display Jewelry

Hi everyone! Today I thought I would show you 6 ways to display your jewelry. Necklaces, bracelets, rings....
1. Cupcake stands. This one isn't such an original idea, everyone does it. But they're so pretty!! I use mine to display my bracelets. You can find some in home decor stores, vintage stores... I found mine at a garage sale. You could even DIY one, there are tons of tutorials on the internet.
2. Branches and antlers make beautiful necklace holders. You can find my tutorial for that branch here.
3. Bowls and plates are very handy and cute to store and display small pieces like rings. I like to separate the gold and the silver ones.
4. Plates are nice for bigger things like perfume bottles and nail polish. I also put some pendants and and pretty fake flowers to decorate it. This plate was diy-ed following this tutorial by ABM.
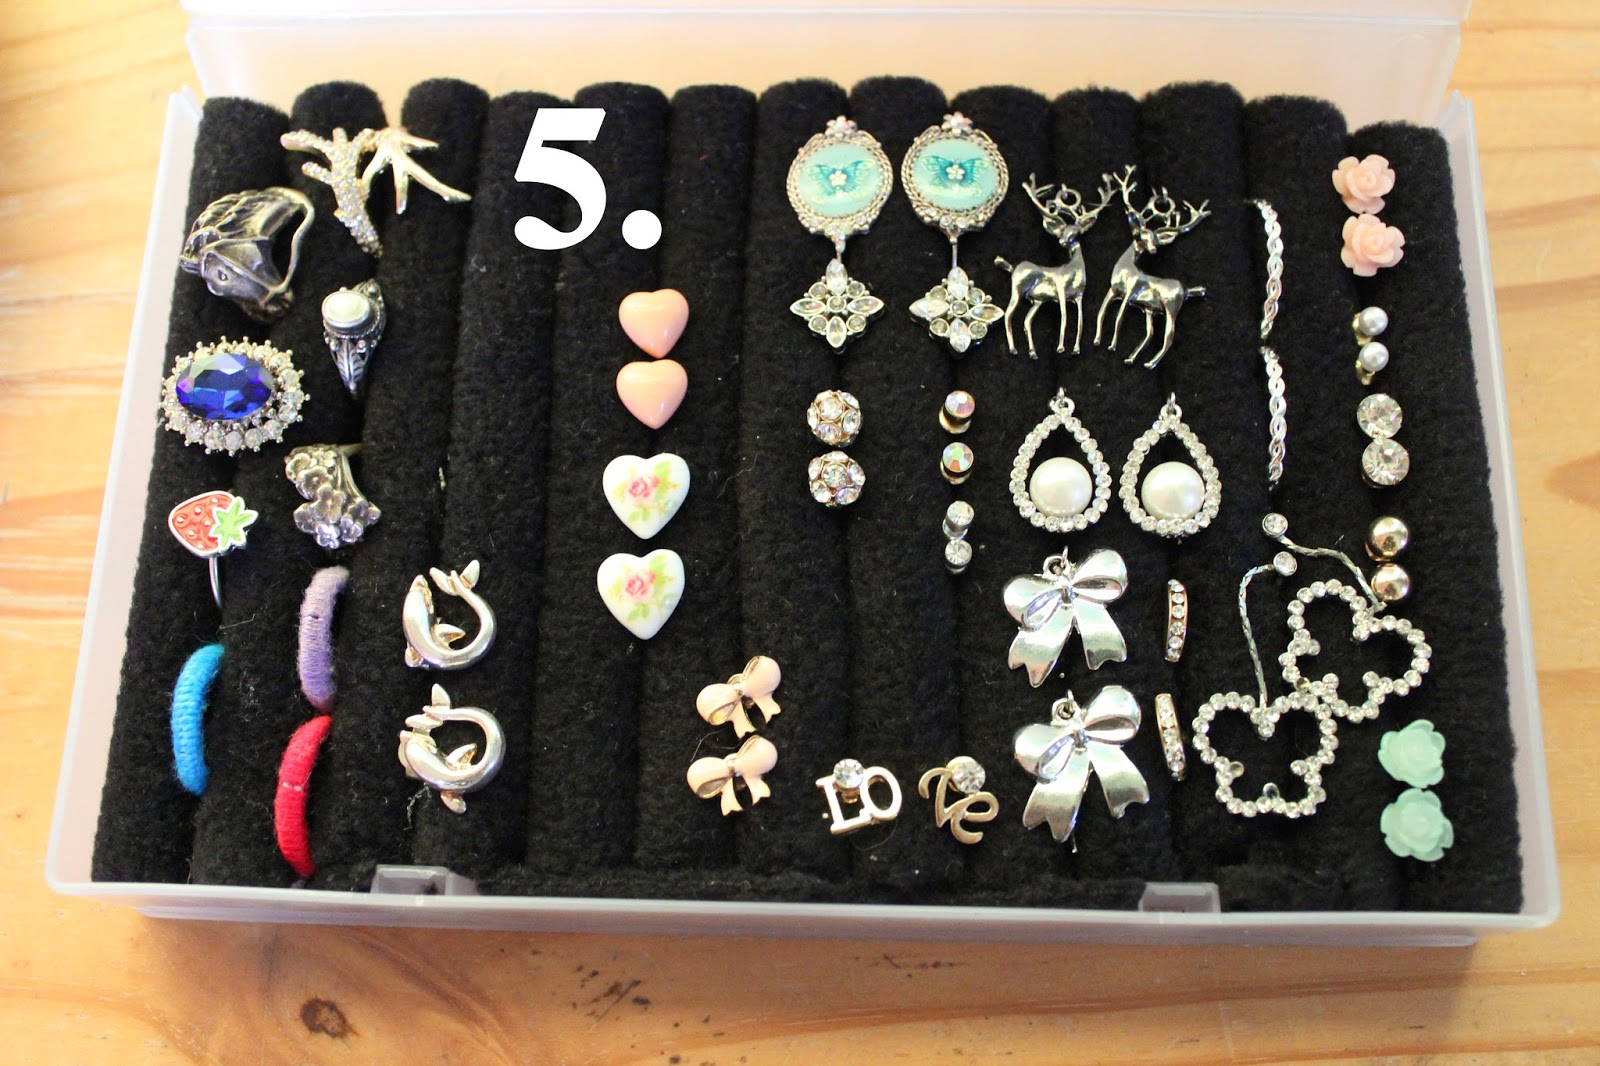
5. This jewelry box is super easy to make yourself! Find out how to make it here.
6. This last one can't really be used to display a huge quantity of necklaces but I like to hang really special pieces on this mirror.
And this is how I keep all my jewelry in my room. I like seeing it every day because it helps me remember what I own and encourages me to wear jewelry more often! I hope this post was helpful. Love, Elsa

Wednesday, February 12

DIY Branch Necklace Holder

Hi everybody!
Valentine's Day is just around the corner, are you exited?
Today, I want to show you this pretty branch that I use to hold my necklaces. I was inspired by all these beautiful antler jewelry holders. I would have loved to make one but then I found this interestingly-shaped branch near my fire place and decided to use it instead. So here's how you can make your own.
You'll need: A branch, some wire, pliers and anything you like to decorate it!
Bend the wire around the branch and make a loop. I made two hooks, but depending on the length or shape of your branch you might need more.
 Hang it to the wall with screws. And hang your necklaces on it!
Then, you can decorate it. I made a paper flower (http://liagriffith.com/ has a lot of great tutorials on different flowers) and stuck it with double-sided tape. And I used the leaves of a fake flower because they just fell off. Of course, you could also leave it simple and natural.
How would you decorate yours? Answer me in the comments and don't forget to follow me bloglovin.
Love, Elsa

Sunday, February 2

DIY Jewelry box

 I made this simple jewelry box to store my rings and stud-earrings. And you can easily make your own!
You'll need some foam, scissors, glue, fabric (I would advise a thick fabric in any color you like) and a box. I used the box of an old video tape.
Measure the size of your box to know what size you'll need to cut your little foam pieces.
Then, glue the foam pieces with the fabric by folding it each time like on the picture above.
For the fabric, I used black so I can really see my jewelry pieces. I think a pattern could be cute but it might distract the attention from the jewelry.
Don't you think these deer earrings are the cutest ? My sister gave them to me for Christmas! And here you go, you got yourself a cute jewelry box. I might do another tutorial to show you how I decorate it.
Love, Elsa